After describing how easily you can test each controller and action in the previous blog post, soon you will face one problem called authentication and authorization.
Should you ignore it and run tests without it? You can but if you want functional tests to be sure all components need to be in place and verify everything works together, then you need to have authentication in place. Apigility handles both authentication and authorization. This is very helpful but it might be tricky to test it.
Apigility allows you to use one of the three authentication methods:
- HTTP Basic
- HTTP Digest
- HTTP Oauth2
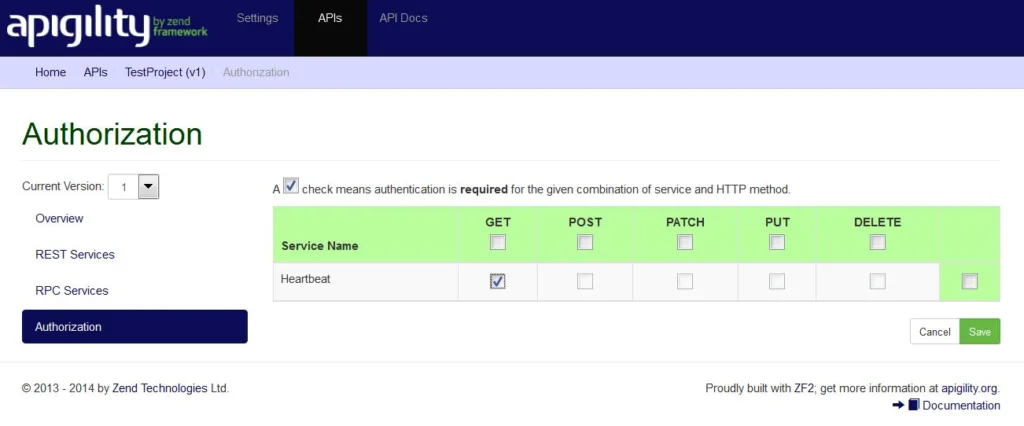
We can protect out heartbeat service described in the previous blog post and require authorization, with Apigility this is very easy to configure:
Testing a protected service is easy, but you should write at least unauthorized and authorized access tests. A basic test could be very easy, just checking correct http response, in this case 403.
public function testHeartbeatActionUnauthorized()
{
    $request = $this->getRequest();
    $request->setMethod('GET');

    $headers = $this->getRequest()->getHeaders();
    $headers->addHeaderLine('Accept', 'application/json');

    $this->dispatch('/heartbeat');

    $this->assertModuleName('TestProject');
    $this->assertControllerClass('HeartbeatController');

    $this->assertResponseStatusCode(403);
}
To test authorized access is a little bit more difficult, but just a little.
Oauth2 is personally my favourite, it’s very flexible and easy to use. But don’t forget it’s designed to work over SSL/TLS. When using Ouath2 authentication there seems to be small bug between Apigility and the Oauth server component.
Even if you set Authorization Bearer to the request header, it’s not picked up correctly, you need one small tweak similar to this to be sure it’s working correctly. Add correct http header but also set HTTP_AUTHORIZATION to $_SERVER:
$headers->addHeaderLine('Authorization', 'Bearer ' . $this->accessToken);
$_SERVER['HTTP_AUTHORIZATION'] = 'Bearer '. $this->accessToken;
In the test it could look like this:
public function testHeartbeatActionAuthorizedOauth()
{
    $request = $this->getRequest();
    $request->setMethod('GET');

    $headers = $this->getRequest()->getHeaders();
    $headers->addHeaderLine('Accept', 'application/json');
    $headers->addHeaderLine('Authorization', 'Bearer ' . $this->accessToken);
    $_SERVER['HTTP_AUTHORIZATION'] = 'Bearer '. $this->accessToken;

    $this->dispatch('/heartbeat');

    $this->assertModuleName('TestProject');
    $this->assertControllerClass('HeartbeatController');

    $this->assertResponseStatusCode(200);
}
You might wonder where $this->accessToken came from. Well, it’s up to you. There are several different ways, but all of them would be called database fixtures.
You can have a predefined SQLite database with known access token, you might use fixture manager to be sure the required records are in the db or insert it with every test execution.
Just remember each test needs to be fast and repeatable.
If you need just simple HTTP Authentication the just add:
$headers->addHeaderLine('WWW-Authenticate', 'Basic realm="api"');
$headers->addHeaderLine('Authorization', 'Basic '.base64_encode('testclient:testpass'));
Where testclient and testpass are the access details stored in your htpasswd file, similar to test fixture for OAuth2, sometimes these are also called test assets.
For some inspiration check zf-oauth2\test\TestAsset
As you can see it’s really easy to write tests even for your controllers and it definitely helps to produce better and more reliable code.